I don’t do too much with SQL, but this one got me for a while, so here’s my story on SQL Server Configuration Manager Aliases.
I had a particular server that couldn’t connect to a specific instance on SQL on another box. Other servers appeared to be fine, but each time SQL Server Management Studio was run and attempted to connect to servername\instancename, it would instead connect to the default instance.
It didn’t matter who logged onto the server either. It would never connect to that secondary instance and I couldn’t work out why.
After much digging and testing, I resorted to reading through forum threads on Google searches, hoping for an idea. What I eventually found was the existence of SQL Client Aliases. These are like hosts file records – hard coded results for connecting to a specific server:
In Sql Server Configuration Manager, you can define an alias for what you’re connecting to. Servername\instancename could map to serverb\instancename or servername\instance2 – this is great when doing testing and wanting to point a server at a different SQL database or instance without changing a bunch of settings.
However, the other catch is the port specified. In the above example, the default SQL port 1433 is used. Makes sense, but each instance uses it’s own port, or uses a dynamic port. I soon discovered that if you try to connect to a SQL instance and have a port defined, the SQL instance you actually connect to is whatever is listening on that defined port.
An easy thing to find if you know where to look for it, and now I do. Hopefully this helps others who come across a similar scenario!
There’s currently an issue with configuring Conditional Access via Azure Active Directory. There’s an open ticket with Microsoft Support, with no ETA at the time of writing.
The issue: When trying to configure a new policy for Conditional Access against an Azure Active Directory application, the ‘New’ page gets stuck loading. I’ve tested this on multiple browsers, tenants, internet connections, computers, and had Microsoft support confirm.
The path to doing this is from the Azure portal – Azure Active Directory > Enterprise Applications > choose your application > Conditional Access > New policy:
The Workaround: Thankfully it’s not a showstopper, as there’s another way to get to Conditional Access and it works fine. Instead of going via a specific app first, you can just go via Azure Active Directory > Conditional Access > New policy. Also Azure Active Directory > Enterprise Applications > Conditional Access > New policy works, it’s just an extra click to the same screen.
Points to take note of – if something’s broken, try accessing the same function from a different route of click-through links and it might work another way. Also, log these issues with Microsoft Support as overall the support is pretty good and often the issue won’t be anything to do with you. Test different scenarios wherever possible too, and also asking the question on Twitter can get some extra attention!
Lenovo’s X1 Yoga for 2018 is now available, and I have my hands on one to review – which I’m using to write this article (Lenovo sometimes provide me with a laptop for review purposes, but that’s not the case for this particular one.)
Initially it looks and feels rather similar to the Gen 2 which I reviewed not that long ago. There are differences, but the jump from Gen 2 > 3 isn’t as big as Gen 1 > 2 was. I’d like to think that’s because they got things pretty right with the Gen2, and there wasn’t as much to change.
First, let’s check out the ‘Tech Specs’ – I’ll bold the options this particular laptop has in the table below.
CPU – Although often there’s little difference between each generation of CPU, there’s actually a big difference this time. If you look at the Intel spec sheet, the core count has doubled from 2 to 4, along with the thread count of 4 to 8. The single core clock speed is lower, down from 2.60Ghz to 1.90Ghz, but the Max Turbo Frequency is the slightly higher at 3.60Ghz rather than the older 3.50Ghz.
What does this all mean? It depends, but overall it’s probably a lot better. Single threaded programs might be a bit slower, but these days if it’s single threaded it’s probably old and anything modern is more than fast enough for it. Multi-threaded programs will go substantially faster. Here’s a benchmark comparison with some figures to demonstrate that. Of course, multitasking with many different programs should be a faster experience too.
Display – I would have loved to have seen that high end display, but the base level one is more than enough still. HDR, Dolby Vision and other high end settings – I need to see this!
RAM – If you want this laptop to last you years, go the 16GB. 8GB is still plenty, but we’re getting closer to 16GB being the standard. For general use, you still probably won’t hit the 8GB limit (unless you have a lot of Chrome tabs open!).
Webcam – I like the new little shutter that’s built in. You see a red dot when it’s closed, and the switch to open it is very small and unobtrusive.
Storage – As always, pick what you think you’ll need. It’s nice and fast!
Weight – Nothing’s changed here, same weight within a few grams as the last few models. It’s not a feather, but it’s light enough.
Case Colour – Yes this one is black, but it’s a bit different. The entire shell is a slightly glossier black than the matte black the last few models have had. The hinges are now black too, which fits in a bit nicer with the black body. There’s also the new X1 logo on the lid and the Lenovo branding on the bottom left of the display – all of which I think looks good. It’s branding without being in your face.
Battery – Same as the last generation, a big 15 hour claim and 12 hours just from an hour charge. I haven’t sat down and tested this, and another review I found claimed a bit under 8 hours which is slightly under the average, but of course it depends on what you do.
Other notes:
The fingerprint reader is a little smaller now, but works the same. Still USB-C charging which is great, but we seem to have lost one of the USB 3 ports on the left hand side. The device supports Microsoft AutoPilot which is good for anyone who wants to set this up on their Azure/Office 365 tenant and send devices out without needing to actually do anything to them.
There’s the new ‘Cortana Premium’ which makes the device pick up voice commands better and from a distance or different angles. The stylus is the same too, which is still a mid-size rapid charging pen that does the job well.
Let’s have a look at all the angles of the X1 Yoga Gen3:
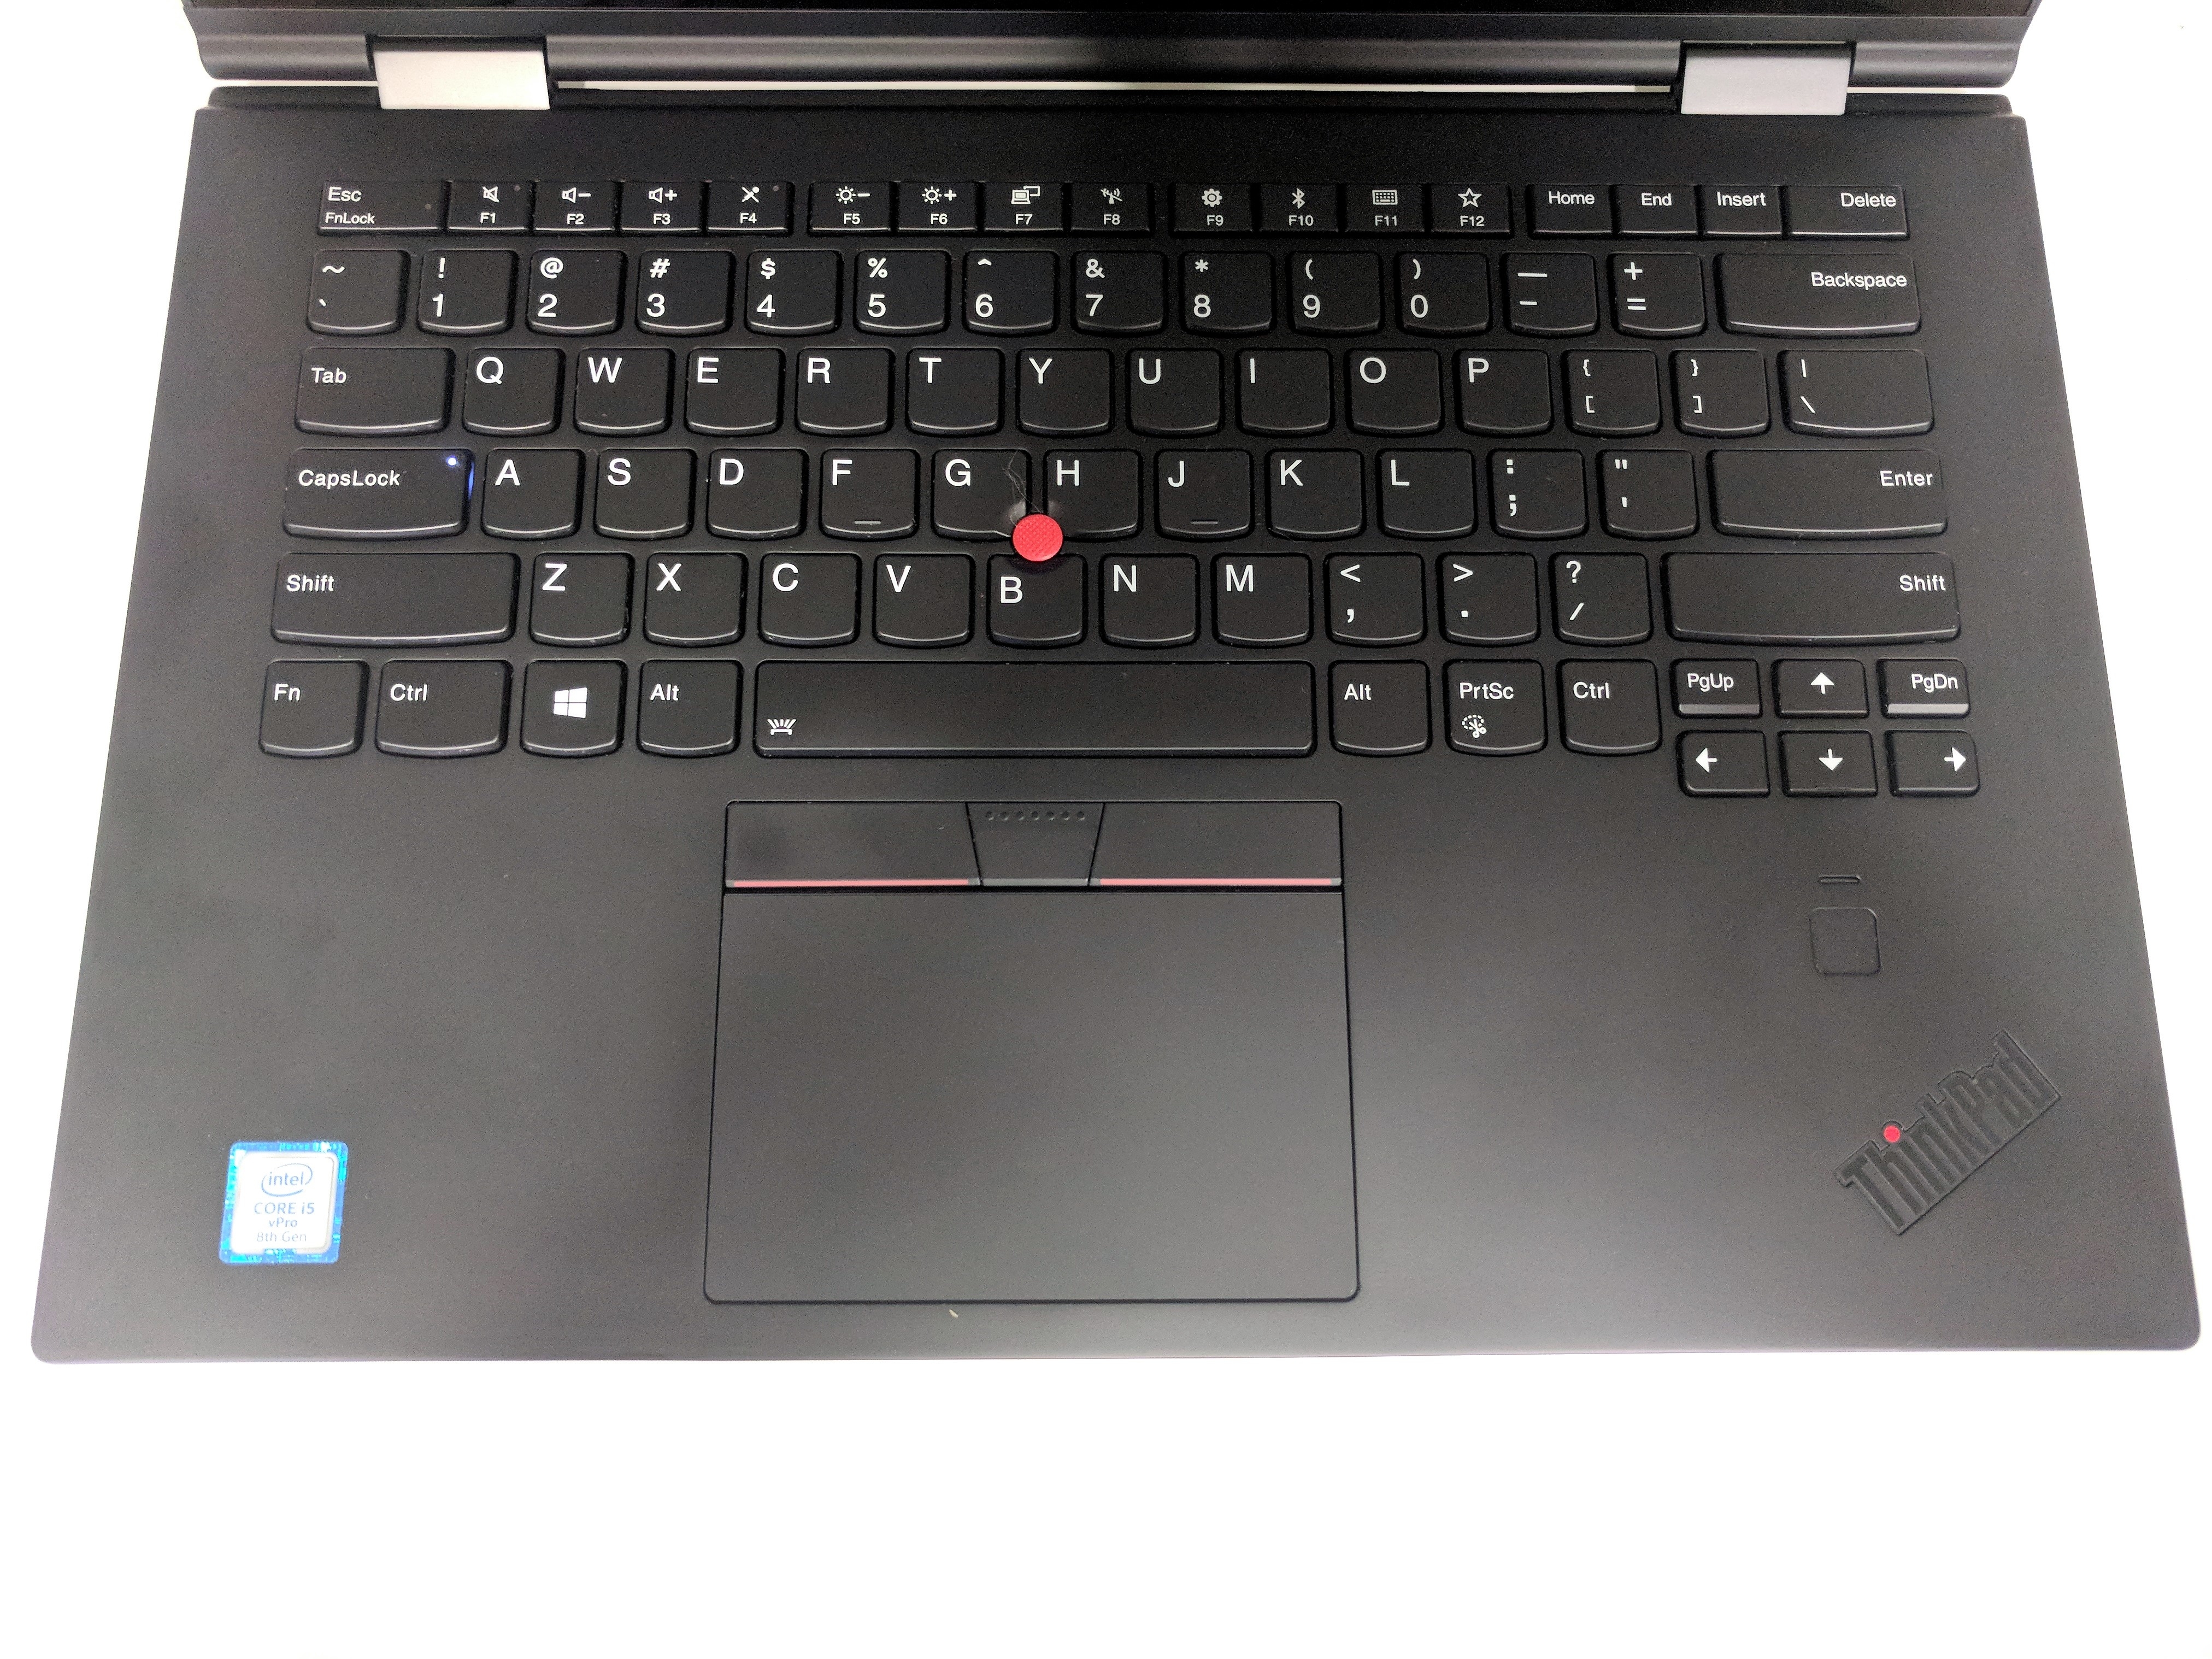
As with most ThinkPads, the keyboard and trackpad are high quality. There’s not any wacky key changes in this model, and it’s very similar to the Gen2.
It was really hard to get a decent picture of the lid due to the new material they’ve used! We’ve now got the new X1 logo in the bottom right, the black hinges at the bottom and the standard ThinkPad logo in the top left, with the dot on the ‘i’ to indicate power on or off.
Again nothing exciting on the base, fingerprints already after I’d wiped it and moved it about which is the price you pay for having a nice black surface. You can see the dual speakers along with the stylus on the bottom left.
Summary – A small upgrade from the last Lenovo ThinkPad Yoga Gen2, the Gen3’s better 4 core CPU is a reasonable selling point. The slight cosmetic changes are all nice, but there’s nothing too drastic that a Gen2 owner should consider upgrading to. However, it’s a big jump from the Gen1 which you can read my original review on too. I’ll do a seperate writeup comparing the three models soon, and it’s still my pick of the ThinkPad lineup that I can’t fault. I’m actually running a VM on it (Windows 10 VM on Windows 10!) to work from and it performs very well for those wondering if they can do the same. Feel free to ask any questions below!
“I’ve lost a document and can’t find it!” is a common phrase that nobody likes to hear. Most people are working in Microsoft Word for their documents, and although it has a bunch of nice features for autorecovering lost work, it doesn’t cover all scenarios.
There’s even a new feature which autosaves your work as you go; as long as the document is in SharePoint Online or OneDrive for Business.
However, it’s still easy for someone to accidentally close a document and say ‘no’ to saving changes, or other scenarios where documents get overwritten with the wrong information. A document management system (DMS) with versioning (such as SharePoint) can help, but I’ve yet to hear of a company that has 100% of their documents at all times in their DMS!
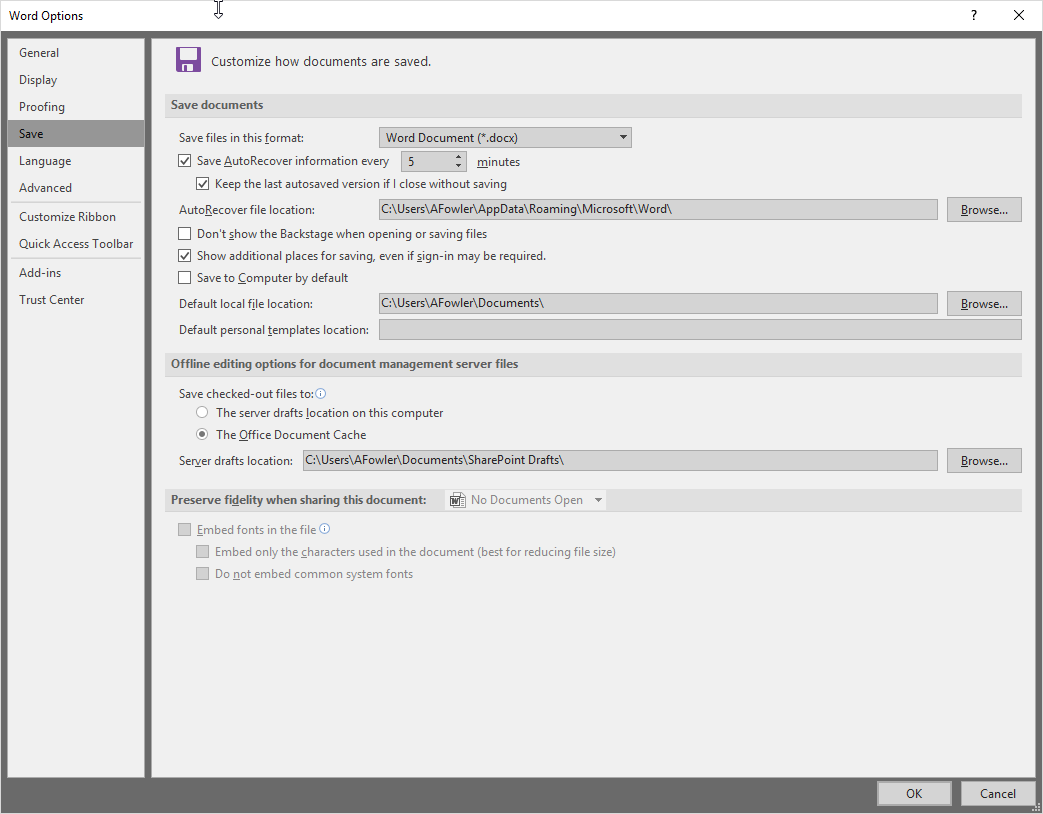
Anyway, after seeing many scenarios of lost work, I thought there might be another method I can implement to help capture lost data. Microsoft Word’s Autorecover function does work quite well, in keeping an ASD file updated at regular intervals (10 minutes by default) which are saved in C:\Users\username\AppData\Roaming\Microsoft\Word\ (by default). I changed this to 5 minutes rather than 10:
Autorecover will update an ASD file in this folder for each document you have open, on the frequency configured above. That file can get closed or lost depending what the user clicks (again, closing and not saving a document is a scenario that will lose the ASD).
My idea was to back up these ASD files also on a 5 minute interval, giving another avenue to restore lost documents. Because the AutoRecover starts at a random time, a script running every 5 minutes would also start at a random time, and together there’d be a 5 to 10 minute window on copying out the backup files, which isn’t a huge amount of work to lose if someone had been working for hours.
Here’s the PowerShell script I wrote. It first sets a few variables that can be configured, then does a cleanup of previous backups. If they’re > 2 days old, backup folders are purged or we’d have an ever growing amount of backups. The 2 day value in (Get-Date).AddDays(-2) can be changed.
Then, it runs a filecheck to make sure there’s ASF files to back up. If not, the script breaks. If files exist though, it then creates the Backup folder, creates a sub folder based on the date/time and then copies the ASD files into that folder.
The format of the folders is set at the very start of the script, and again can be changed to a different format if you prefer.
(note that the File copy section was taken from here). Save the above as a .PS1 script and you’re good to go.
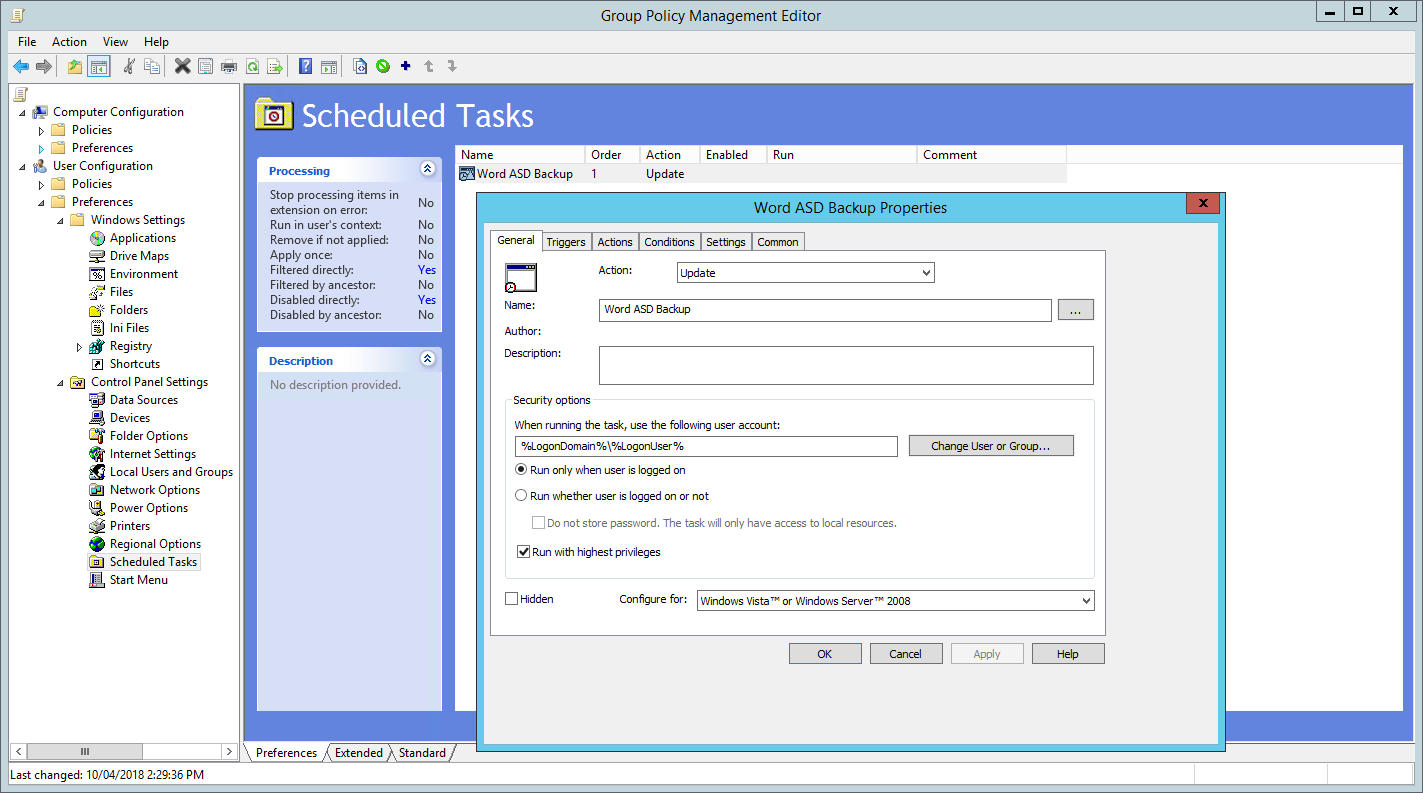
That worked well after a lot of testing, but the next problem was getting it to run on everyone’s computer. Using a Scheduled Task means we can configure it to run however often we like and whenever we like, as well as being able to push out the task via Group Policy. However, you can’t run PowerShell scripts silently just by running a PS1 file when triggered from Scheduled Tasks.
There is a great workaround here which uses a VBS file to then trigger the above PS1 script. the VBS component itself runs silently which in turn runs the PS1 script silently. Here’s a copy of the script in case the link goes dead, but please read the original link for more details:
Set objShell = CreateObject("Wscript.Shell")
Set args = Wscript.Arguments
For Each arg In args
 Dim PSRun
 PSRun = "powershell.exe -WindowStyle hidden -ExecutionPolicy bypass -NonInteractive -File " & arg
 objShell.Run(PSRun),0
Next
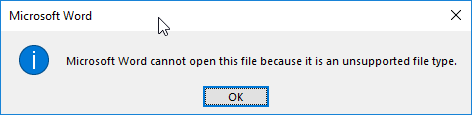
The final catch is then opening an ASD file when you want to recover something. To open a recovered file, in Word go to File > Info > Manage Document > Recover Unsaved Document (if the Info link is greyed out, open a new blank document first). If you had to navigate away from the default location it shows to open the ASD file, you will probably see this error:
As pointed out here, for some reason Word doesn’t like opening the file unless it’s in the special ‘UnsavedFiles’ location. Luckily you can just copy the ASD file into this folder (which by default is C:\Users\%username%\AppData\Local\Microsoft\Office\UnsavedFiles” ) and then open it as per the above method.
Keep in mind, both the PS1 and VBS files also need to be available to the user, which you may want to also push out by Group Policy. Just make sure the file called by the Scheduled Task exists, or the users will see an error saying the file can’t be found, every single time the script runs.
Update 20th August 2020
Few more updates, support for PowerPoint, changed the backup location to the ‘Recover Unsaved Documents’ location so staff don’t need to remember a particular location. Feel free to post any questions about it.
Going from Exchange On-Premises to Exchange Online can be a bit of a learning curve. One of the changes is having to worry about licensing a lot more; on-prem you can have as many service accounts as you need (e.g. a ticketing application may need access to a mailbox to send and receive emails, or to create IT Helpdesk jobs from emails) and you’re good to go.
With Exchange Online however, every single account needs to be licensed. As per Microsoft’s FAQ on the topic:
How is Exchange Online licensed?
Exchange Online is licensed via a subscription model in which each user needs a User Subscription License (USL). Three types of subscriptions are available: Exchange Online Kiosk, Exchange Online Plan 1, and Exchange Online Plan 2. These subscriptions can be purchased on their own or as part of an Office 365 plan that includes SharePoint Online, Skype for Business Online, and Office ProPlus.
Here’s a breakdown of all the license options for Exchange Online, and what features each license has.
Your normal users are probably going to have some sort of business package applied to each user – one of the most common is Office 365 Enterprise E3, but generally not value for money for a single purpose service account.
The Exchange Online Kiosk plan is the cheapest, but limited. Also note that there’s the Office 365 F1 plan which includes Exchange Online Kiosk, but again is a more expensive package with features you probably don’t need. Although this license can also be used to access another mailbox, there are many limitations such as “Exchange Online Kiosk does not provide access rights for utilization with on-premises servers.” and the ability to access the mailbox using Microsoft Outlook. It also can’t use Exchange Web Services (EWS) which is one of the more modern ways that a developer will read or manipulate emails.
Exchange Online Kiosk has the brief description of “Basic messaging and calendaring plan with Web email and POP access.” If you purely want to send emails via SMTP using Office 365’s SMTP connector, then this is what you need.
For most other functions, you’ll need at least Exchange Online Plan 1. This is the next cheapest option, and gives you a standard fully working Exchange Online account with a fully functional mailbox.
There is another option around all this; if you’re happy to run Exchange Hybrid but have all your mailboxes in Exchange Online, you’re entitled to a free Exchange Server license. With that in place, you can use SMTP relays to allow your on-premises accounts to use that connecter without a license, and have that relay back to Office 365. It’s also possible to do ignoring Exchange Hybrid if you build your own IIS server and SMTP Relay. Both of these options are great for devices like printers that may be sending emails anonymously, or to avoid changing configuration of all your devices with the new Office 365 SMTP server smtp.office365.com .
As you’ll need to do license management and probably be looking at month to month charges, it’s important to understand licensing and allocate in the most cost effective way. Of course, all this may change so please check official Microsoft documentation to ensure you’re getting what you need.


 Lid
Lid Front
Front Back
Back Base
Base Left Side – USB-C In, USB-C Out, USB3
 Right Side – Stylus, Power, 3.5mm Audio Jack, Mini Ethernet, USB3, HDMI Out, Kensington Lock


